I see the question “What’s the best grain for Panaeolus cyanescens?” get asked a lot so I wanted to share my experience with y’all. In this post, I’ll break down what pans are looking for in a grain, which grains work best and which ones to avoid, plus I’ll go over how prepare your grains for colonization, and share a couple of my favorite recipes!
What Panaeolus Cyanescens Need in a Grain
Panaeolus cyanescens do best with grains that don’t retain a lot of moisture, aren’t overly starchy, and are smaller in size, providing plenty of inoculation points. This gives their fast-moving mycelium the structure necessary to colonize quickly while accessing the nutrients they need.
Best and Worst Grains for Growing Panaeolus Cyanescens
Best Grains
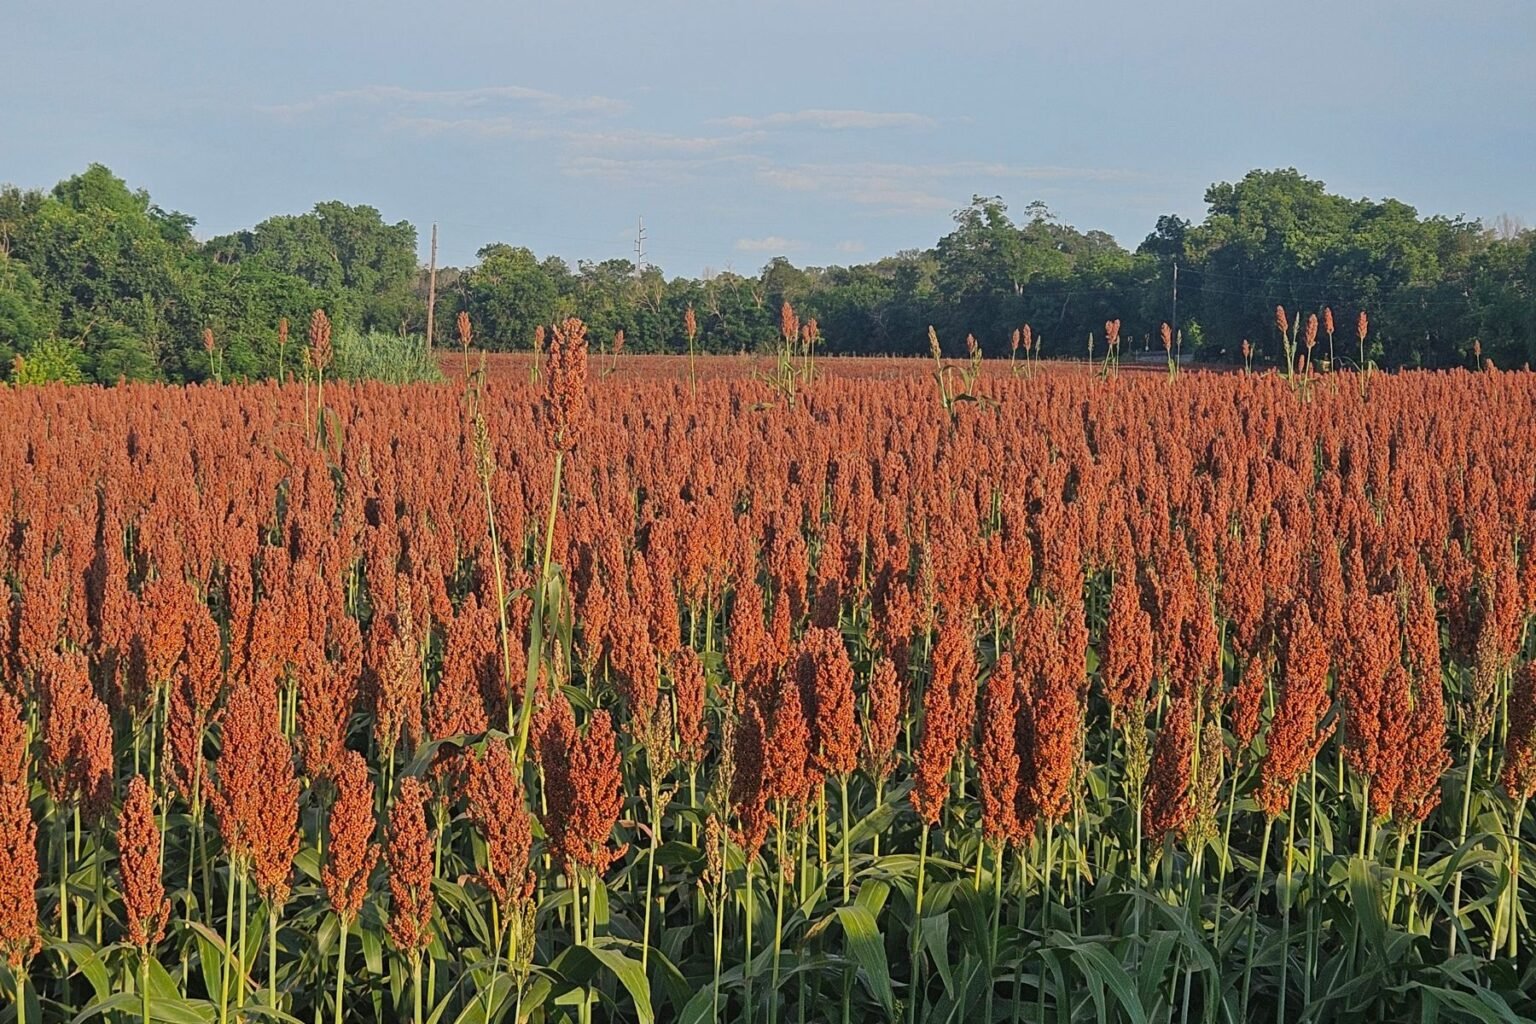
Milo / Sorghum (#1 choice)
Pros: Affordable, nutritious, medium-sized grain that hydrates well without holding too much water. It’s low in starch, has plenty of inoculation points, and colonizes fast. Plus red milo is really pretty.
Cons: none
Where to buy: Azure Standard, Local Feed Mill, Natural Grocers (carries smaller 2lb bags).
Millet (White Proso, Unhulled)
Pros: Small grain with lots of inoculation points. Stays light and breathable. Supports quick, even colonization.
Cons: More expensive than other grains. Doesn’t retain much moisture so it can be harder to prep. Works best when mixed with another grain like milo, wheat or rye.
Where to buy: Local Feed Mill, Amazon.
Hard Red Wheat
Pros: Affordable, very nutritious, slightly larger grain that hydrates well. Best choice if not using manure in your substrate.
Cons: Can get sticky. Works best when mixed with another grain like milo and/or millet.
Where to buy: Azure Standard, Local Feed Mill, Natural Grocers (carries smaller 2lb bags).
Wild Bird Seed (select mixes)
Pros: Since WBS is a mix of several grains, it can provide a more complete nutritional profile. It also offers a range of grain sizes providing lots of inoculation points.
Cons: Most WBS mixes include grains that are not beneficial to mushrooms so you need to be careful about the mix you select. Look for mixes that have a base of milo, millet and wheat and avoid mixes that contain sunflower seeds, peanuts and other grains/seeds not on this list (or at least pick them out before prepping). Another thing to note is the grains in WBS hydrate at different speeds so it can be difficult to prep. I prefer just making my own mix which I share below.
Where to buy: Amazon, online and local retailers.
Rye Berries
While not the best choice for pans, it can work. Rye does best when mixed with at least one other hard grain such as millet or milo because it’s large, starchy and retains a lot of moisture. If it’s all you have access to, that’s ok, just make sure it’s not overhydrated and that the outside is thoroughly dry before loading into jars.
Where to buy: Azure Standard, Local Feed Mill, Amazon, Natural Grocers (carries smaller 2lb bags).
Grains to Avoid
Corn
The kernels are large, dense, and trap moisture inside, which creates the perfect environment for bacterial contamination.
Oats
Too soft and quick to get slimy, especially when overhydrated. The texture breaks down easily and doesn’t offer enough structure or airflow for pans.
Brown Rice
High in sugar and easy to overhydrate. It tends to clump together, rot, and contaminate more easily than other grains.
BRF / PF Tek
This works great for cubes but not so much for pans. The flour-based substrate lacks the structure and air exchange pans need for strong colonization and fruiting.
How to Prepare Grains for Colonization
The process to prep your grains is very similar regardless of the grain(s) you use. The primary difference is the time it takes to hydrate them.
Step 1: Rinse your grains
Pour your grains in a large stock pot or bucket, cover them with water and swirl around getting the dust and debris off. Pour out the excess water through a strainer. Repeat this process 3-4x until the water is mostly clear.
Exception: the only grain I skip this step with is millet since it’s so small and falls through the holes of most strainers.
Step 2: Soak your grains
Fill your container with water, cover with a lid, and let soak for about 22 hours. I like to include a couple tablespoons of gypsum during this step for the added minerals, but it’s not necessary. Pans will colonize grain with or without it.
Step 3: Simmer to Perfection
If you’re using rye, you can usually skip this step but if you’re using milo or millet, you’ll want to lightly simmer them (not boil), for about 5-10 minutes until the grains are al dente. You’ll know they’re done when the grains are still firm but start to give when squeezed hard between your fingers. Be careful not to over do this step or they’ll split and turn into a starchy mess.
Note: if you’re using multiple grains, its best to soak them separately so you don’t overhydrate one and underhydrate the other. Milo and millet are ok to soak and simmer together but any other combo I’d do separately.
Step 4: Dry your grains
Pour the excess water out and let them sit in strainers for 30-60 min. If you’re using millet, you can go ahead and load them semi wet into jars after this step. If you’re using any other grain, spread them out on a flat surface for 2-4 hours until the outside is dry but the inside is still moist.
Step 5: Load your grain into jars
Fill your jars about ⅔-¾ full of grains. You don’t want to fill them up completely or you won’t have room to shake. I love using a wide mouth funnel for this step.
Lids: If this is your first time sterilizing grains, you’ll want to prepare your lids beforehand. I love this brand here for regular mouth lids and wide mouth lids. They’re a nice thick plastic that holds up great in the pressure cooker, have a sturdy silicone seal and look pretty on your jars.
For quart sized jars, I like to drill two, ¼” holes in the top and cover them with 20mm synthetic filter disc stickers for air exchange. If you’re using pint sized jars, a single ¼” hole is perfect.
Step 6: Sterilize your grains
Cover the top of your jars with aluminum foil, place them in your PC, and sterilize for 2-2.5 hours at 15 PSI.
Step 7: Rest for 24 hours
Once the PC is cooled down and the pressure has returned to 0, I like to take the jars out and set them on a shelf overnight so the excess condensation can evaporate.
My Go-To Grain Recipe
If you’re only using one grain, I’d recommend Red Milo. It’s super easy to prep, affordable, and works great with all mushrooms.
My favorite recipe:
- 75% Red Milo
- 25% White Proso Millet (unhulled)
If I’m feeling fancy, I’ll mix some wheat in there too:
- 60% Red Milo
- 20% White Proso Millet (unhulled)
- 20% Hard Red Wheat
FAQs
What’s the best grain for colonizing Pan cyans?
Milo, millet and hard red wheat work best because they’re smaller in size, don’t retain a lot of moisture and have a balanced nutritional profile.
Do Pan cyans like the same grain as Cubensis?
While most grains used for cubensis can work for pans, they definitely do better on grains that don’t retain a lot of moisture.
Can I use rye for Pan Cyan?
You can, but it’s not the best choice. Rye is larger in size, starchy, and holds more moisture than other grains which slows down colonization. If it’s all you have access to, it’ll work, just make sure it’s not overhydrated and the outside is thoroughly dry before loading into jars.
Is Wild Bird Seed a good option?
It can be but ironically, the lower quality WBS that contains “filler” seeds such as millet, milo and wheat work best. You want to avoid mixes that contain grains and seeds that aren’t beneficial to mushrooms, such as sunflower seeds and peanuts (or at least pick them out before prepping).
Can I use BRF cakes instead of grain?
No, I don’t recommend it. BRF cakes work well for cubes but not pans due to the flour based structure.
Do I need to add gypsum to my grain?
No, pans colonize grain great with or without it. The added minerals definitely don’t hurt though.
What grain should I use if I don’t want to add manure to my substrate?
Hard red wheat has the best nutritional profile when using a poo-less substrate but milo, or a combo of milo and millet works well too.
Where’s the best place to buy grain?
Local feed mills usually have the best prices, but you can also order online through Azure Standard, Amazon, or even pick up smaller bags at health food stores such as Natural Grocers.